

Water Drop Photography | EVERY STEP from start to finish
There’s something special about photos of water droplets. I personally like the element of surprise, because you can’t predict the exact shape you’re going to get. You can create fantastic photos using only water and some color, and photographer Adam Karnacz shares an in-depth tutorial for making them. He’ll guide you through all the steps, from setup to printing your final work. So, watch his video to learn what you’ll need and how to approach this interesting area of photography.
To add color to the droplets, Adam mixes water with some xanthan gum, double cream, and food dye. He uses an electronic droplet system to add the colored drops to the water. But of course, you can go with something more basic, like an eyedropper.
As for the gear, it’s recommended that you use a macro lens. In Adam’s case, it’s a Canon EF 100mm f/2.8L IS USM attached to a Canon 5D Mark IV. He uses two speedlights and highlights their importance, because it’s a flash that freezes the motion of the droplets. One flash lights the droplets as they hit the water surface, while the other lights the background, and they are both triggered remotely.
When it comes to the camera settings, the recommended aperture is between f/8 and f/16. In this video, Adam chooses f/11, at ISO 400. As for the shutter speed, you should choose the sync speed of the flash, which is usually 1/250s.
The last thing before you start shooting is getting the focus right. Place a pencil to the spot where the droplets will hit the water, and adjust the focus until the pencil is sharp. And now you’re ready to shoot!
Once you start shooting, you’ll realize photographing water droplets isn’t a matter of setting up and shooting away. It requires a lot of adjustments in light placement, droplet size, timing, color and thickness of the liquid and so on. In other words, there will be a lot of trial and error. But don’t let it frustrate you, but observe it as playing and exploring.
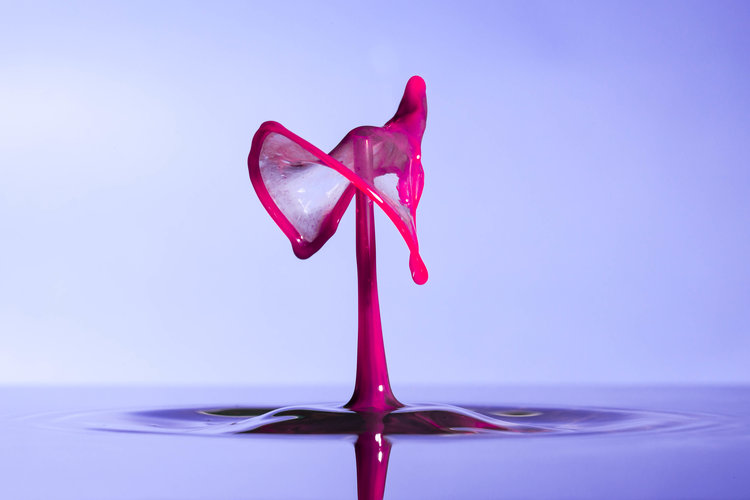
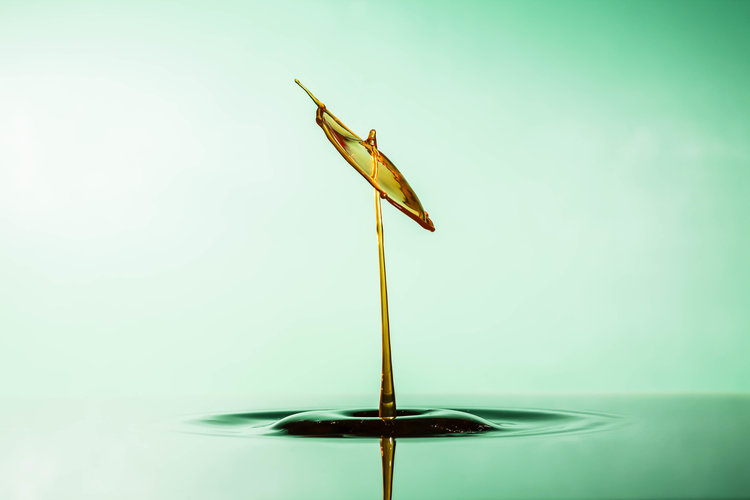
Adam shares his editing process as well, demonstrating it on some photos he chose among the 270 shots he took. It basically comes down to editing exposure, contrast, clarity, hue, and saturation. He also removes a highlighted area the flash created in his image, as well as a couple of imperfections. Of course, with your photos, it will depend on what you want to achieve. But basically, the editing process doesn’t seem too complicated. Here are some photos Adam chose:
Finally, when the editing is done, Adam prints his final image using a Canon PIXMA PRO-10 printer, and frames it so it’s ready to be hung on a wall. Of course, if you’re fine with your photos just being displayed online, you can skip this. But printing your images definitely has its good sides, so I think you should consider it. Here’s the photo Adam decided to print and frame:


